Thursday 21 June 2012

Best Brownies Ever!!!!

I came across a recipe for brownies on facebook a while ago and saw that it needed golden syrup which I didn't have at the time so I put off making them and put golden syrup on my list. This week I finally got organised and picked it up as well as some dark chocolate chips and today was the day!

Unfortunately I could not find the recipe on facebook and so took to trusty google for some recipe ideas...none of which had golden syrup in and I had had all the ingredients needed anyway!

I chose a recipe from VegWeb (from an anonymous poster) called Chewy Gooey Brownies because I am one of those people who like either rock hard brownies or chewy ones...not the soft crumbly cake type.

I mostly stuck to the recipe but I changed the nuts and added in my chocolate chips.

Here goes:

Ingredients:


1 cup plain flour
1 cup sugar
1/4 cup of cocoa powder (I didn't actually measure and probably put more in than this...I love my brownies VERY chocolatey!)
1/2 tsp salt
1/2 tsp baking powder
1/2 tsp vanilla essence
1/2 cup water
1/2 cup vegetable oil (I used sunflower)
1/2 cup nuts (I used a mixture of chopped mixed nuts and flaked almonds)
chocolate chips- as many as you wish :)

Method- so so easy!!!


  1. Preheat the oven to 180 degrees celcius (350F)
  2. Mix together the dry ingredients. 
  3. Add the wet ingredients. 
  4. Stir well.
  5. Put into a greased/lined baking tray.
  6. Bake for 20 minutes
  7. Let cool.
  8. ENJOY!!!
These seriously couldn't be any easier or any tastier. My boyfriend and I are a little hooked and we haven't even had dinner yet. They are the perfect level of hardness and chewyness and leave a rich chocolatey taste long after finishing....making you want more! Make sure you have plenty of people to eat them so you don't scoff them all at once. I have no self control when it comes to chocolate brownies!

Sunday 10 June 2012

Individual Bakewell Tarts

Bakewell tarts have always been a favourite of mine. I love sweet almondy things and I also think they look pretty and no one can resist them. I have never made them, not even in my non-vegan days but I haven't had time to do any baking recently since we moved and realised there was a massive gap in posts so being a nice lazy Sunday when I should be studying I trawled the internet for a recipe and decided to make these delicious bakewell tarts. The recipe is by Katie Green and I got it from dessert girl's blog. It is for a large bakewell tart but I don't have a tart dish yet so I decided to make little ones in my muffin tin. For this I needed double the quantity of pastry and half the icing again so I will write down the amounts I used but if you want a large one you can go to dessert girl's page (or work it out if you are better at maths than me at working backwards!) but Katie Green did some wonderful illustrations so I would check it out anyway here: http://dessertgirl.blogspot.co.uk/2010/04/mixing-bowl-bakewell-tart-by-katie.html

For the pastry:
120g margarine
300g plain flour
40g sugar
40g silken tofu

For the inside:
Cherry or raspberry jam (I used about 1/3 of a jar)
75g margarine
75g sugar
75g silken tofu
50g ground almonds
1 1/2 tsp baking powder
1 1/2 tsp almond essence
50g self raising flour

For the icing:
150g icing sugar
1 1/2 tbs water
Glace cherries for decoration


  • Start with the pastry. Rub the margarine into the flour until you get a breadcrumb consistency. Add the sugar and the tofu and mix together. Bring the dough together in your hands. Wrap it in clingfilm and refrigerate for about an hour.
  • Preheat your oven to 180 degrees celcius. Roll out the pastry on a floured surface until around 5mm thick. Cut circles from it and press firmly into your greased muffin tin. Prick the bottom of the pastry, put a little grease-proof paper in and then cover in baking beans. Bake you pastry for 20 mins (check at 15, if they are browning then take out now).
  • While the pastry is cooking make the cake part. Beat the sugar into the margarine. Add the other ingredients (except the jam) and stir until well mixed.
  • When the pastry is out and the beans and paper are taken out, add a layer of jam to the bottom of each case and then spoon your cake mixture on top of this. It should fill the cases almost to the top. Put these back in the oven for around 45 minutes (check at about 30 to see how they are doing as one of my batches seemed cooked before the 45 minutes). They should be a golden brown colour.
  • Once cool mix the icing sugar and water to a smooth consistency and spread onto the tarts. Decorate with a glace cherry and voila!


These tarts are also very lovely without the icing. Another idea would be to place flaked almonds on top of the cake mixture before baking for an alternative look.

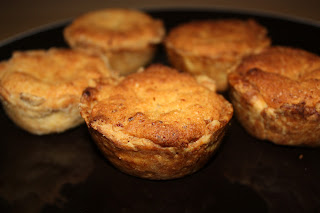
These are the tarts without the icing:

 And then with:

I have to say these are super delicious and look uber cute! Waiting for an hour for the dough is always a challenge in patience for me but they are definitely worth it. Enjoy!